


Table of Contents
If you’ve ever found yourself locked out of your own WordPress site, you know the frustration. I certainly felt it when I made a seemingly simple change to my Wordfence settings that caused all sorts of trouble. Here’s my story of how I was locked out and, more importantly, how I managed to get back in.
It all started when I decided to tighten up my Wordfence security settings. I had set the firewall to block users if they exceeded more than 10 requests, thinking it would prevent brute force attacks. At the same time, I noticed that my wp-admin-ajax.php file was being flooded with requests, so I added it to the blocklist. In hindsight, that was a mistake, but at the time, it seemed like the right thing to do.
The Moment I Realized I Was Locked Out
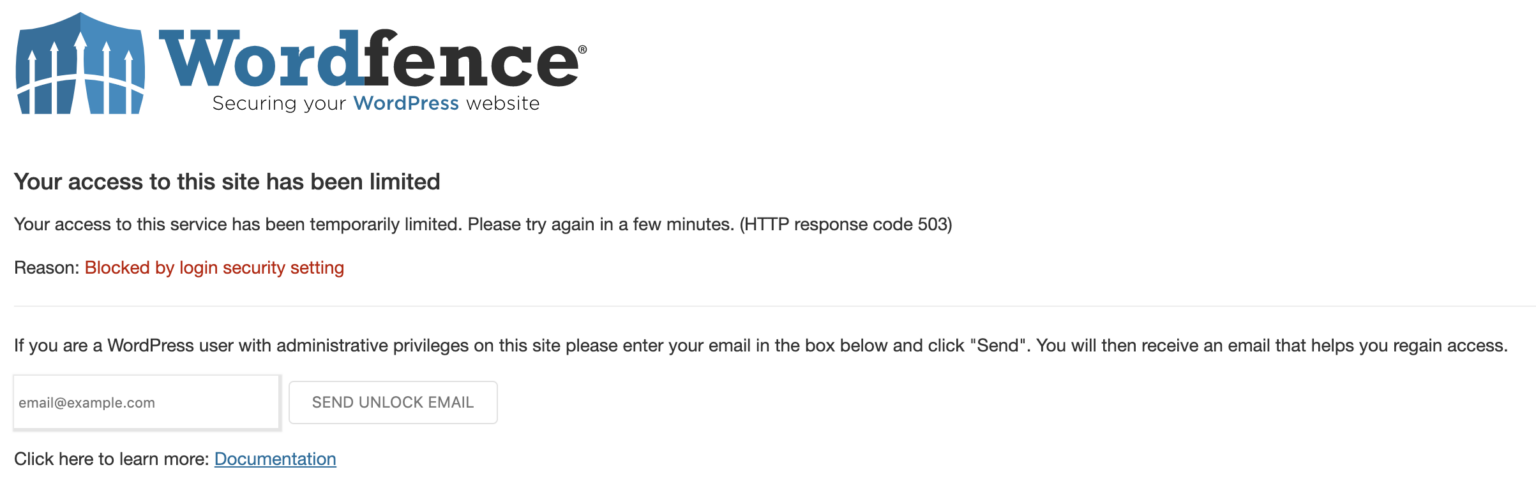
Everything seemed fine after I saved the settings and tried to Navigate around my WordPress site but to my dismay, I was greeted with a “403 Forbidden” screen. I quickly realized that Wordfence had blocked my IP address, and the admin-ajax.php block was preventing me from even using the WordPress dashboard. I felt like I was in a loop of frustration—every time I tried to log by sending an Unlock link to my email, Wordfence would block me instantly.
Attempting to Fix It
I immediately jumped into action. My first instinct was to access my file manager through my hosting provider. I renamed the Wordfence plugin folder to disable it temporarily. This gave me access to the WordPress dashboard again, but I knew I couldn’t leave Wordfence disabled forever—it’s essential for site security.
I tried to modify the firewall settings directly through the database and file manager, but I couldn’t find a clear way to change them. I was stuck, unsure of what to do next. That’s when I realized that Wordfence was still treating my IP as a threat, and the admin-ajax.php block was the main issue.
Enter Wordfence Assistant
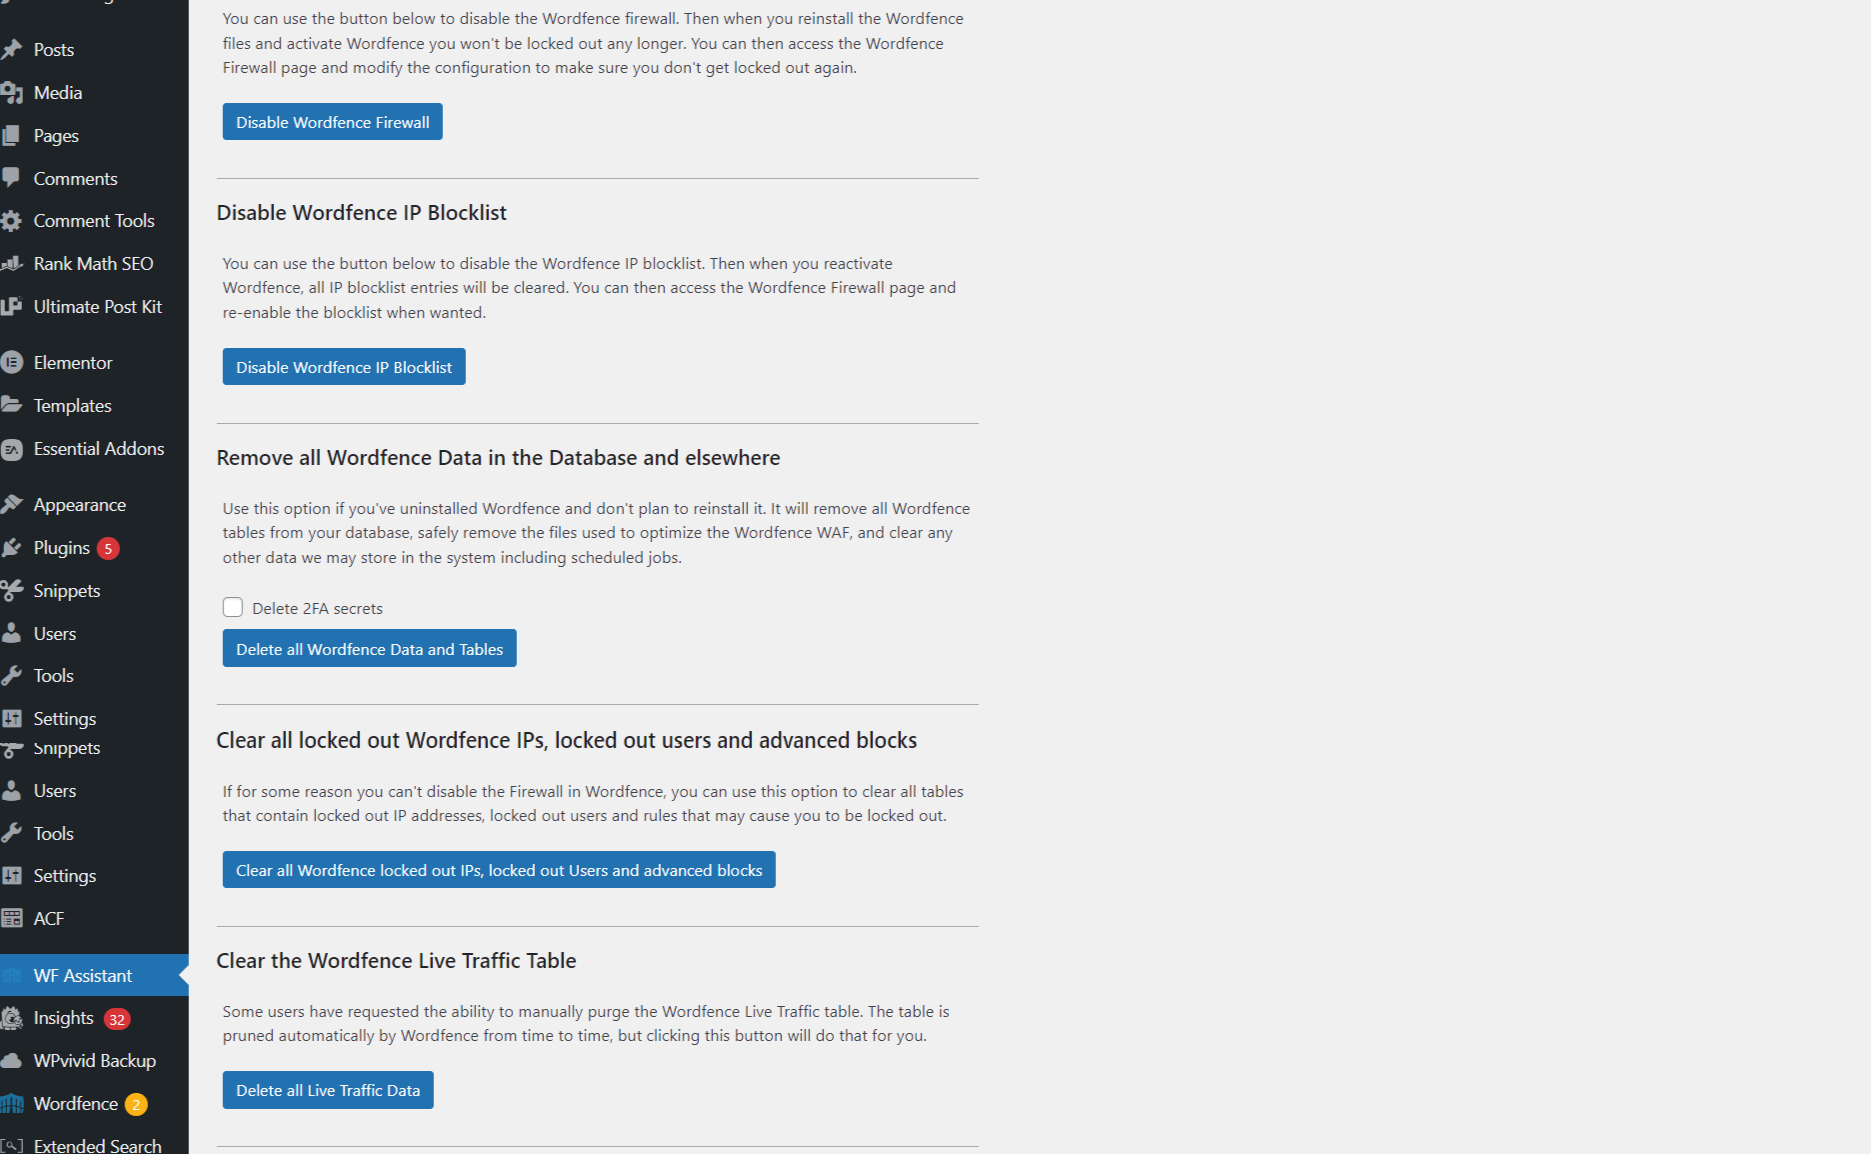
After some research and feeling like I had exhausted all other options, I decided to try Wordfence Assistant, a plugin designed for situations just like this. Once I installed it, I used it to disable the Wordfence firewall. With the firewall off, I was able to access the settings again without being blocked. I immediately removed the blocked IPs from the list and unblocked wp-admin-ajax.php.
The Relief of Regaining Access
Once I had removed the blocks and re-enabled the firewall, I logged back into my site without any issues. It was a relief to see everything working smoothly again, and I had learned a valuable lesson about being cautious with blocking critical WordPress components like admin-ajax.php.
Conclusion
If you ever find yourself in a similar situation where Wordfence locks you out, follow these steps to regain access:
- Disable Wordfence via File Manager or FTP: Access your site’s file manager or use an FTP client to rename the Wordfence plugin folder (e.g., to
wordfence_bak). This will disable the plugin and allow you to log in. - Log in to Your Dashboard: Once disabled, attempt to log into your WordPress dashboard.
- Install Wordfence Assistant: After logging in, install the Wordfence Assistant plugin to manage your firewall settings without restrictions.
- Disable the Firewall: Use the assistant to turn off the Wordfence firewall temporarily.
- Remove Blocked IPs: Check the blocking settings and remove any IPs that may have been blocked erroneously, including your own.
- Unblock Critical Files: Ensure that important files like
wp-admin-ajax.phpare not on the blocklist. - Re-enable Wordfence: Rename the Wordfence plugin folder back to its original name to reactivate it.
- Adjust Firewall Settings: After reactivation, review and adjust your firewall settings to avoid future lockouts.
In my case, the lesson was clear: be careful with the settings you modify in Wordfence. But if things go wrong, there’s always a way back in—thanks to a little bit of troubleshooting and Wordfence Assistant.