Microsoft Word is more than just a tool for typing documents; it’s packed with features and formatting options that can take your work to the next level. While most people are familiar with its basic functions, many don’t realize that Word also offers a range of tools for adding visual elements like shapes, diagrams, and even freehand drawings. If you’ve ever wondered how to draw or sketch directly in Microsoft Word, you’re in for a pleasant surprise. With a few clicks, you can create eye-catching illustrations and customize your documents in ways you never thought possible.
CONTENTS;
- How to Create Shapes in Word Easily
- Tips for Creating Freehand Drawings in Word
- A Complete Guide to Using Drawing Tools in Microsoft Word
Whether you’d like to call attention to a certain part of your document, or you’d just like to add some flair, this guide will teach you the ins and outs of drawing in Microsoft Word.
How to Create Shapes in Word Easily
When people think of the word “draw,” they often imagine creating shapes, lines, and other objects by hand. Instead of struggling to draw perfect circles or squares manually, you can use Microsoft Word’s shape feature to achieve precise, professional results with just a few clicks.
Step 1: Open Your Document in Microsoft Word
- Launch Microsoft Word on your computer.
- Start a new document by selecting “Blank Document”, or open an existing document where you want to add shapes.
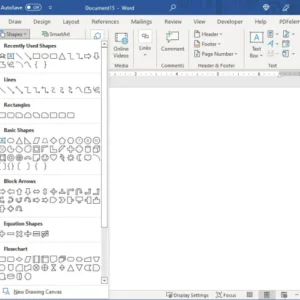
Step 2: Find the Shape Tool
- Click on the “Insert” tab located in the top toolbar.
- Select the “Shapes” button from the dropdown menu. This will display a variety of shape options, from basic geometric shapes to more complex icons.
Step 3: Select Your Desired Shape
- Scroll through the shape options and choose the one that fits your needs—whether it’s a rectangle, circle, arrow, or something more specific.
- Click on the shape you want to use.
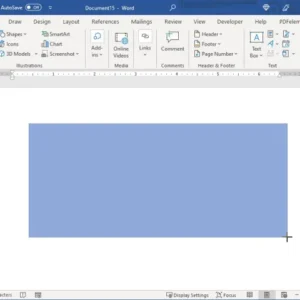
Step 4: Draw the Shape in Your Document
- Click where you want the shape to appear in your document.
- Hold down the left mouse button and drag your cursor to draw the shape. Release the button when you’re satisfied with its size.
Step 5: Customize Your Shape
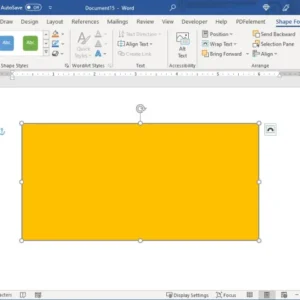
- Once the shape is in place, use the “Shape Format” tab to customize its appearance.
- Click on “Shape Fill” to choose a color or gradient for your shape.
- Adjust the “Shape Outline” to change the border color and thickness.
- Explore “Shape Effects” for additional enhancements like shadows, reflections, and 3D effects.
Step 6: Adjust Size and Position
- To move the shape, click on it to select it, then drag it to your preferred location within the document.
- Resize the shape by clicking on its corners or sides and dragging to your desired dimensions.
Step 7: Save Your Work
- To ensure you don’t lose your changes, save your document by clicking “File”, then “Save As”.
- Choose a location on your computer and save the file with an appropriate name.Tips for Creating Freehand Drawings in Word
Microsoft Word isn’t just for typing and formatting text—it also offers creative tools for adding custom freehand drawings to your documents. Whether you’re adding personal touches to a report or creating unique illustrations for a project, Word’s freehand drawing tools can help you get the job done. Here’s a step-by-step guide to making the most out of these tools.
Step 1: Open Your Document in Microsoft Word
- Launch Microsoft Word and open the document where you want to add your freehand drawing.
- If you’re starting fresh, select “Blank Document” to begin a new project.
Step 2: Access the Drawing Tools
- Go to the “Insert” tab on the top toolbar.
- Click on “Shapes” to reveal the dropdown menu of drawing options.
Step 3: Choose the Freehand Drawing Tool
- In the Shapes menu, scroll down to find “Scribble”—this tool allows you to draw freehand directly on your document.
- Click on “Scribble” to select it.
Step 4: Draw Freehand
- Move your cursor to the spot in the document where you want to start drawing.
- Click and hold the left mouse button, then draw your freehand illustration. Release the button when you’re done.
Step 5: Customize Your Freehand Drawing
- Once you’ve completed your drawing, use the “Shape Format” tab to make adjustments.
- Change the “Shape Outline” color and thickness to suit your design.
- Add “Shape Effects” like shadows or glows for a more polished look.
Step 6: Adjust the Drawing’s Position and Size
- Click on your freehand drawing to select it.
- To move the drawing, simply drag it to your desired location within the document.
- Resize it by clicking on the drawing’s corners or sides and adjusting to the size you want.
Step 7: Save Your Document
- To ensure you don’t lose your work, save your document regularly.
- Click “File”, then “Save As”, choose a location on your computer, and give your file a name.
Pro Tips:
- Experiment with Different Tools: Besides the Scribble tool, explore other shape options in Word for a variety of drawing effects.
- Use Drawing Guides: For more precise drawings, turn on gridlines or use the ruler feature available in the “View” tab.
- Combine Shapes: You can layer and combine different shapes and lines to create more complex drawings.
How to use the drawing tools in Word
One more way to draw a picture or sketch in Word is with the tools on the Draw tab.
Step 1: Head over to the Draw tab and select a tool at the top. You can choose from various pens, a pencil, a highlighter, or the Action Pen tool. You’ll also notice an eraser to perfect your drawing.
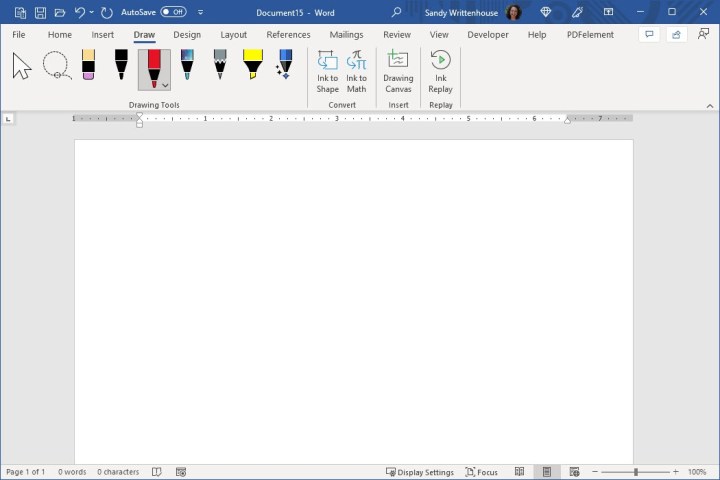
Step 2: To choose a color for your drawing tool, select the tool and then click the arrow that displays in the lower-right corner. You’ll see a palette of colors you can pick from, along with thicknesses for the line.

Step 3: If you want a specific color you don’t see, select More colors and then select a shade or enter the RGB or HEX code for the color you want.
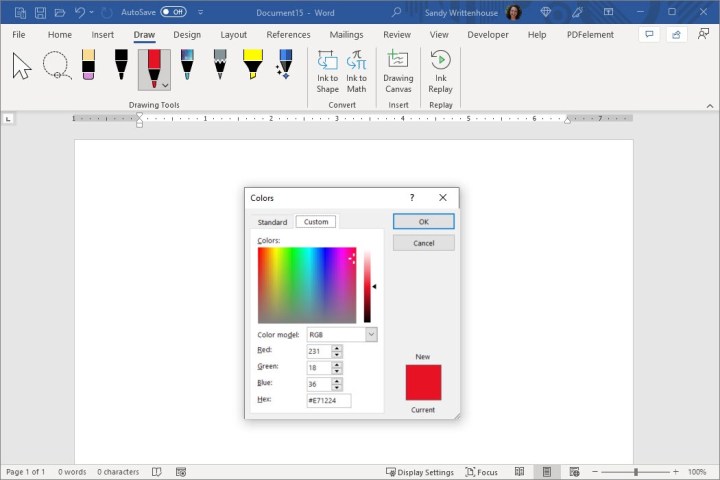
Step 4: Another option on the Draw tab is to use a Drawing canvas. Click this option in the ribbon to create a specific area for your sketch and then draw inside it.

Step 5: When you finish with your drawing, select the large Arrow icon in the ribbon, on the fa- left side, to move or resize your drawing.

Whatever type of picture you want to draw, whether its something detailed with your artistic skills or something simple like your initials or a smiley face, you now know how to draw in Word with its helpful features and handy tools.

